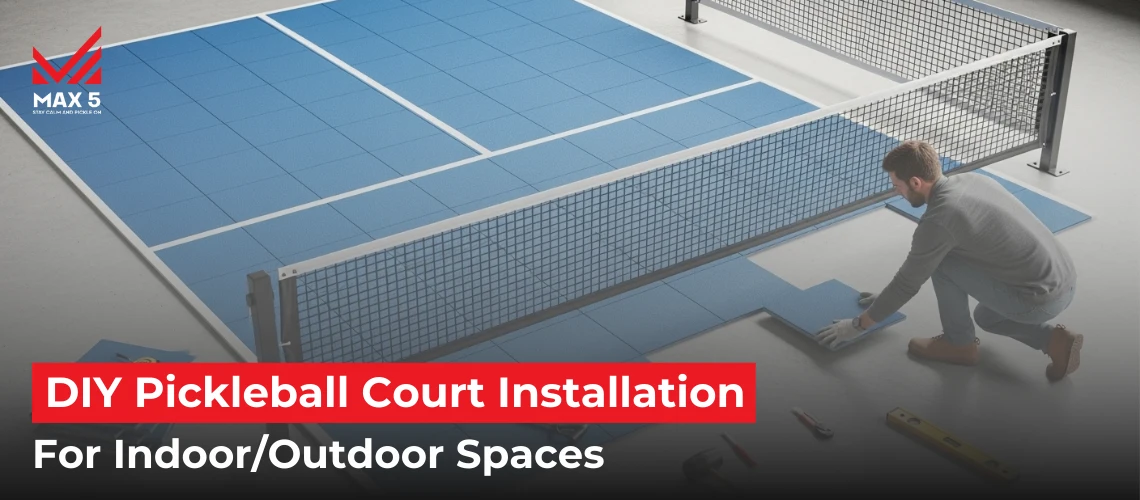
DIY Pickleball Court Installation For Indoor/Outdoor Spaces
Pickleball Court Installation isn’t just for luxury homes or recreational centers. It can be constructed for HOAs, parks, apartments, and even backyard spaces. Upgrade your lifestyle and that of your community with this small investment (it’s affordable to build pickleball courts). It’s cheaper than a tennis setup and easier to maintain than a pool. This guide covers everything, because players deserve courts that match the energy they bring, indoors or out. With the right surface and layout, you can transform driveways, offices, or patios into an indoor or outdoor pickleball court.
Pickleball Court Cost Breakdown
With inflated costs, the cost of building pickleball courts is anywhere from $12,000 to $35,000+. Based on estimation & construction experience, basic backyard pickleball court installation without fencing or lighting usually runs between $12,000 and $18,000 (Source: Sport master). More polished or permanent builds can cross $30K fast.
How much does a backyard pickleball court cost? Ours costs $34,000. The biggest cost jump comes from prep; if your site needs drainage, leveling, or machine access, handle that first, or it’ll cost you later. For DIYers or anyone hiring contractors, here’s how it breaks down:
Component | Estimated Cost (USD) | Details |
Concrete Slab (30’ x 60’) | $10,800-$14,400 | $6-$8 per sq ft. Includes excavation, base layer, forming, and finish work. |
Surfacing & Coatings | $5,000-$7,000 | Cushioning, color, and permanent lines. Add $1K-$2K for pro labor. |
Lighting & Fencing (Optional) | $4,000-$15,000 | Floodlights, vinyl, or chain-link fencing. Pushes into $30K-$50K range. |
Net + Accessories | $300-$800 | Regulation net, center strap, ball holders, markers, etc. |
Indoor/Multi-Court Setup | $100,000+ | For full builds, HVAC, insulation, pro surfacing, and structure mods. |
Everything You Need to Construct a DIY Pickleball Court
Tools & Equipment
- Shovel
- Rake
- Plate compactor (rent one)
- Stakes + string (for layout)
- Measuring tape
- 2-ft level or laser level
- Mixer (if not using a truck)
- Bull float or magnesium float
- Concrete saw (for expansion joints if needed)
- Portable net system (21’9” regulation)
- Center strap and anchors (optional for tension)
Materials
- Crushed gravel or road base (4–6 inches deep)
- Vapor barrier plastic sheeting (6 mil or thicker)
- 2×6 lumber for concrete framing
- Rebar or mesh (optional for slab strength)
- Standard concrete mix (2500–3000 PSI) – approx. 11–13 cubic yards
- Anchor bolts (if planning permanent net posts)
- 2 gallons of muriatic acid
- Hose + push broom
- Safety gear (gloves, goggles, mask)
- 2–3 gallons acrylic crack patch
- Putty knife or trowel
- 4–6 pails of black acrylic resurfacer with sand
- Large squeegee (24”–30”)
- Paint rollers or textured rollers (heavy-duty)
- 1 pail ColorPlus Blue
- 1 pail ColorPlus Gray
- 4 pails neutral base with sand
- Drill + paddle mixer (for mixing thick paint)
- 1 gallon textured white line paint
- FrogTape + contractor-grade 2” tape (at least 10 rolls total)
- Chalk line or measuring tape
- Construction paper or masking roll (for masking large areas)
Optional Upgrades
- LED floodlights or pole-mounted battery lights
- Vinyl or chain-link fencing (only if needed—balls don’t bounce far)
- Court benches or folding chairs
- Shade sail or pop-up tent
- Pickleball paddle + ball set (USAPA-approved recommended)
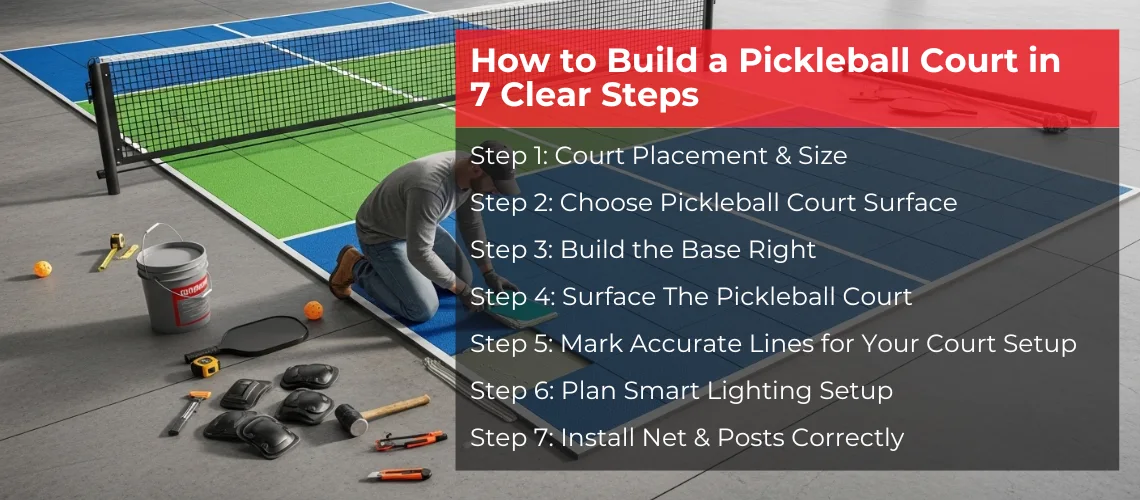
How to Build a Pickleball Court in 7 Clear Steps
A pickleball court is a great investment as players get addicted fast, whether they are young or old. Players keep coming back, and a home or shared-use court makes sense long-term. In this section, you’ll learn how to size, place, and position your court right from the start.
Step 1: Court Placement & Size
Before we get into the construction aspect, understand pickleball court layout:
Pickleball Court Dimensions
- Play area: 20′ x 44′
- Minimum space: 30′ x 60′: just enough for doubles
- Recommended: 34′ x 64′: adds safe margins and room for sideline play
- Going bigger adds ~20% to cost, but gives you space to move
NOT FOR EDITOR: Add a court dimension diagram here if you can as all competitors had added
Pickleball Court Construction Specifications
- Baselines: Back boundary lines
- Sidelines: Run full court length
- Non-volley zone: 7′ from net, both sides (the kitchen)
- Centerline: Splits service areas
- Service areas: Zones behind the NVZ
Best Court Direction
North/south is preferred. East/west puts the sun in someone’s face during early or late games. Shade from trees or fences can help. Indoors, orientation is flexible, but still ALWAYS follow the correct layout. No need to overbuild fences either. Pickleballs don’t bounce far like tennis balls. Grass or soft landscaping around the court will do the job.
Step 2: Choose Pickleball Court Surface
This is where the money goes. For pickleball construction, you need a hard & flat surface. Outdoors, a concrete slab for a pickleball court is ideal; it’s durable, consistent, and easy to maintain. Asphalt is cheaper but cracks fast and needs frequent resurfacing. Grass won’t work as the ball won’t bounce properly.
Indoors, your biggest concern is grip and bounce. Use sport tiles or modular court flooring designed for indoor ball sports. Modular plastic tiles work well over worn driveways or uneven ground. If you’re lucky enough to have a tennis or basketball court already, you can just update the lines and the net.
We went with a 4″ concrete pad, standard mix, around 2500 PSI. Cost us close to $10K including grading, framing, and the pour.
Step 3: Build the Base Right
In our backyard, we dug down about 6-8 inches, then compacted the soil with a plate compactor. Graded it with a slight slope, roughly 1 degree, so water drains off. Before pouring, we laid down a vapor barrier (just thick plastic sheeting) to keep moisture from pushing up into the slab. Most skip it, but trust us, it’s worth doing right.
Framed the slab with 2x6s and poured the concrete in one go. Standard 2500 PSI mix, finished smooth. Let it cure for the full 28 days. You can walk on it after a few, but don’t rush the next steps.
Step 4: Surface The Pickleball Court
Once cured, we got to work on surfacing:
- Washed it down with muriatic acid (full gloves + mask)
- Filled every crack and saw joint with acrylic patch
- Rolled on two coats of black acrylic resurfacer, gritty stuff that sets the base
- Mixed and rolled on Pickleball Court Paint (we used a drill mixer, thick mix, dries fast)
Keep your strokes even, don’t stop mid-roll, and always work in daylight. The first coat looks shiny and uneven. Second coat evens it all out. The surface ended up non-slip, clean, and solid bounce, exactly what we wanted. Ready for lines and net once dry.
Step 5: Mark Accurate Lines for Your Court Setup
This part matters. The lines are what make a court a court. They define your service boxes, non-volley zone, and out-of-bounds. Start with this:
Use 2-inch-wide lines, standard for all residential pickleball courts. If you’re painting, use quality painter’s tape or contractor-grade chalk to outline both sides of each line. Indoors, FrogTape or vinyl court tape works. On outdoor courts, sidewalk chalk, crayon, or orange masking tape can all do the job.
Painting?
Prime first. Paint second. Two coats minimum. Pull the tape while the paint is still wet to avoid peeling. Don’t rush the second coat if the temperature’s high; paint dries faster than you think.
No paint? No problem.
For a diy pickleball court demo, vinyl EZ lines or electric tape work short-term, just expect movement with play. If taping on wood, test first so you don’t ruin your floor finish.
Step 6: Plan Smart Lighting Setup
If you want to play after dark, lighting isn’t optional. You don’t need tennis-level coverage, but you do need a setup that’s bright, balanced, and neighbor-safe.
For outdoor lighting, two LED fixtures on side poles work fine for a single home pickleball court. Aim the lights downward and away from property lines. That keeps things lit without blasting into windows. A 20-30 foot pole height is common.
We went with battery-powered LED poles, super bright, portable, and don’t require trenching or wiring. Just store them indoors between uses for longer life. Expect to spend $4k-$5k for a permanent outdoor lighting install (fixtures + labor). You’ll also want a lighting plan with foot-candle specs if your HOA requires one.
For indoor courts, standard LED or fluorescent shop lights are enough. No special fixtures needed unless you’re going pro. The main thing: mount them high and keep glare off the court.
Step 7: Install Net & Posts Correctly
The pickleball net setup is simple, but small errors ruin play. Here’s how to do it right the first time. The net should stretch 21’9” across, supported by posts exactly 22 feet apart. Once strung up, it must sit 36 inches high at the sides and 34 inches at the centre; that slight dip matters for serves and rallies. The net material can be any mesh that blocks the ball. Just make sure the top edge has a cord or cable and is covered with 2-inch tape for visibility and tension.
You’ve got options:
- Portable net kits start around $500. Great for short-term or shared spaces.
- Permanent net systems can run $2,500+, but may require anchoring into concrete, which can crack or shift over time.
For a detailed comparison of dimensions and layouts, check out our full guide on Pickleball Court vs Tennis Court Size, Lines & Layout
Pro Tips for Smoother Pickleball Court Installation
- Noise management” The classic “pwock” is music to us, but neighbors might disagree. Use dense hedges (7ft+), fences with acoustic panels, or even baffles if in tight residential zones. A 2-7 dB reduction can keep the peace.
- Add amenities that scale with your budget: Start simple with benches or shade sails. Expand later to include pergolas, fencing upgrades, or even lighting automation.
- Plan for drying time: Acrylic surfacing and crack patching need a full cure time. If your slab’s been hit by rain or sprinklers within a week, wait. Moisture trapped inside concrete rises later, causing bubbling or surface cracks.
- Use the right tape: Frog tape works better than standard construction tape for sharp, clean court lines. It saves time during the line-painting step.
- Crack patching is a must: Don’t just skim over gaps. Push acrylic filler deep into every crack before surfacing to avoid splitting later.
- Follow surface layer logic: We recommend layering base > color coats > accent zones > lines. Do blue before gray for visual pop, but expect more masking work.
- Vet your contractor smart: Look for actual sports court builds (not just driveways), firm completion dates, local references, and detailed quotes. Avoid scope creep and surprise charges.
- Pro tip: If longevity matters, don’t skip vapor barrier or slab grinding. And yes, hairline cracks may still form. Post-tension slabs help reduce them.
Wrap-Up! Gear Up to Play on Your Home Pickleball Court
Your homemade pickleball court is finally game-ready. Whether you went full DIY or hired a team, you’ve tackled the steps that matter: prep, drainage, surfacing, painting, and net setup. Now finish it off with paddles and balls that hold up to serious rallies. We recommend USAPA-approved carbon paddles for precision and durability, and tournament-grade outdoor balls that stay stable in wind and heat.